 (screen.width/2)){this.width = (this.width/2)}" onclick="javascript:if(this.width > (screen.width/2)){this.width = (this.width/2)} else {this.width = (this.width*2)}" border="0" alt='Posted image: Click to resize'>
DTB Member 792 - Henton Rijsdijk - yessss
Zo gister de deurgrepen aangepakt. Is wel veel werk maar het resultaat mag er zijn vind ik.
(screen.width/2)){this.width = (this.width/2)}" onclick="javascript:if(this.width > (screen.width/2)){this.width = (this.width/2)} else {this.width = (this.width*2)}" border="0" alt='Posted image: Click to resize'>
(screen.width/2)){this.width = (this.width/2)}" onclick="javascript:if(this.width > (screen.width/2)){this.width = (this.width/2)} else {this.width = (this.width*2)}" border="0" alt='Posted image: Click to resize'>Vandaag 11-11-2007 merkte ik dat er remolie lekte tussen de hoofdremcylinder en de vaccuum pot.
Zoals ik al gelezen heb zal het afdichtingsrubber in de hoofdremcylinder versleten zijn.
nu zag ik dat er 4 dezelfde rubbers op de as zitten. Ik heb er 1 afgehaald en verwisseld met de buitenste.
Die binnenkant van de hoofdremcylinder zag er niet verweerd uit zover ik kon zien.
- Zou dit afdoende zijn ?
- Of toch maar een gereviseerde op zien te doen ?
Verder merkte ik op dat er geen pakking zat tussen de hoofdremcylinder en de vaccuumpot klopt dit?
Ook heb ik de kachelradiateur eruit gehaald want deze was lek, en een andere, die hopelijk dicht blijft (getest op waterdruk) roestvrij gemaakt en gespoten.
Die kan er als alles droog is weer terug in.
Zo de dag is weer nuttig besteed aan het project.
Kleine tegenvaller met de hoofdremcylinder maar ik merk het liever nu dan als ik klaar ben.
Edited By Brutus on 1194805726
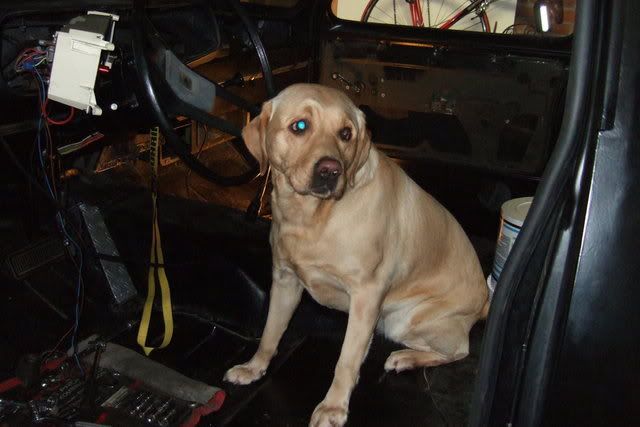
Vandaag 12-11-2007 de kachelradiateur terug gezet. ik had een goed en gezellige hulpje maar zat wel regelmatig in de weg..
als ik een sleutel vroeg kreeg ik een schroevendraaier maar hij deed zijn best.
 (screen.width/2)){this.width = (this.width/2)}" onclick="javascript:if(this.width > (screen.width/2)){this.width = (this.width/2)} else {this.width = (this.width*2)}" border="0" alt='Posted image: Click to resize'>
 (screen.width/2)){this.width = (this.width/2)}" onclick="javascript:if(this.width > (screen.width/2)){this.width = (this.width/2)} else {this.width = (this.width*2)}" border="0" alt='Posted image: Click to resize'>
 (screen.width/2)){this.width = (this.width/2)}" onclick="javascript:if(this.width > (screen.width/2)){this.width = (this.width/2)} else {this.width = (this.width*2)}" border="0" alt='Posted image: Click to resize'>
Edited By Brutus on 1194877688
als ik een sleutel vroeg kreeg ik een schroevendraaier maar hij deed zijn best.
(screen.width/2)){this.width = (this.width/2)}" onclick="javascript:if(this.width > (screen.width/2)){this.width = (this.width/2)} else {this.width = (this.width*2)}" border="0" alt='Posted image: Click to resize'> (screen.width/2)){this.width = (this.width/2)}" onclick="javascript:if(this.width > (screen.width/2)){this.width = (this.width/2)} else {this.width = (this.width*2)}" border="0" alt='Posted image: Click to resize'> (screen.width/2)){this.width = (this.width/2)}" onclick="javascript:if(this.width > (screen.width/2)){this.width = (this.width/2)} else {this.width = (this.width*2)}" border="0" alt='Posted image: Click to resize'>Edited By Brutus on 1194877688
-
78-1101662633
Vandaag 15-11-2007 de verlichting aangepakt. Bleek nog niet zo eenvoudig als ik dacht. Niks deed het of maar heel zwakjes. En nu dacht ik waar te beginnen ? Samen met een vriend gezocht naar het probleem en we kwamen er al snel aan uit dat de massa het probleem wel eens kon zijn. Eerst aan de voorkant goede massa gemaakt en jawel er was licht in de duisternis. maar achter deed nog steeds niks het. Zal ook wel de massa zijn dus alles goed schoon gemaakt en massa draad getrokken rechtstreeks van de accu om te kijken of dat het was. En jawel ook daar kwam weer licht. Gelijk maar goede massa gemaakt met het Chassis en de Laadbak. Alleen de knipperlichten weigerde dienst. Bleek het relais te zijn. verwisseld met het gevarenlicht relais en dat was het dus. Bij de montage van de koplampen vond ik de verstelling op zijn zachts gezegd gammel. Dus ook dat maar gelijk goed gemaakt met m6 boutjes wat goed is gegaan. Alles zit nu veel steviger en is makkelijk te verstellen.
Op naar het volgende deel van het project.
Wordt vervolgd.
 (screen.width/2)){this.width = (this.width/2)}" onclick="javascript:if(this.width > (screen.width/2)){this.width = (this.width/2)} else {this.width = (this.width*2)}" border="0" alt='Posted image: Click to resize'>
 (screen.width/2)){this.width = (this.width/2)}" onclick="javascript:if(this.width > (screen.width/2)){this.width = (this.width/2)} else {this.width = (this.width*2)}" border="0" alt='Posted image: Click to resize'>
 (screen.width/2)){this.width = (this.width/2)}" onclick="javascript:if(this.width > (screen.width/2)){this.width = (this.width/2)} else {this.width = (this.width*2)}" border="0" alt='Posted image: Click to resize'>
Op naar het volgende deel van het project.
Wordt vervolgd.
(screen.width/2)){this.width = (this.width/2)}" onclick="javascript:if(this.width > (screen.width/2)){this.width = (this.width/2)} else {this.width = (this.width*2)}" border="0" alt='Posted image: Click to resize'> (screen.width/2)){this.width = (this.width/2)}" onclick="javascript:if(this.width > (screen.width/2)){this.width = (this.width/2)} else {this.width = (this.width*2)}" border="0" alt='Posted image: Click to resize'> (screen.width/2)){this.width = (this.width/2)}" onclick="javascript:if(this.width > (screen.width/2)){this.width = (this.width/2)} else {this.width = (this.width*2)}" border="0" alt='Posted image: Click to resize'>Ziet er netje uit............... ik heb zoveel aan de mijne vervangen ik had beter hetzelfde kunnen doen als jou :D 
gr maiky
intruder vl1500lc 99 custom
kawa gpx 600 r 1992
kawa gpx 750 r 1987 custom naked
Gilera typhoon snor 2002 power one getuned 85 km/h
WARNING!! objects in mirror are dumber than they appear!!.
Denk om mijn snelheid matig uw kinderen!!!!!!!
intruder vl1500lc 99 custom
kawa gpx 600 r 1992
kawa gpx 750 r 1987 custom naked
Gilera typhoon snor 2002 power one getuned 85 km/h
WARNING!! objects in mirror are dumber than they appear!!.
Denk om mijn snelheid matig uw kinderen!!!!!!!
als je lampen van een golf gebruikt, dan zet je ineens allezs over.
voetplaat en koplamp inclusief de afregeling.
 (screen.width/2)){this.width = (this.width/2)}" onclick="javascript:if(this.width > (screen.width/2)){this.width = (this.width/2)} else {this.width = (this.width*2)}" border="0" alt='Posted image: Click to resize'>
Edited By fcapri on 1195231980
voetplaat en koplamp inclusief de afregeling.
(screen.width/2)){this.width = (this.width/2)}" onclick="javascript:if(this.width > (screen.width/2)){this.width = (this.width/2)} else {this.width = (this.width*2)}" border="0" alt='Posted image: Click to resize'>Edited By fcapri on 1195231980
Zo inmiddels zitten de zijruiten en spiegels er weer op.
Wat een gepiel om die stijl van dat kleine raampje erin te krijgen ppppfffff. Zeker als je niet weet hoe ze eruit zijn gehaald. Dat heeft me een hele avond gekost met veel *&^%^(*& maar het is uiteindelijk toch gelukt.
De tip om de rubbers te gebruiken van een citroen bx was een goede want die passen echt alsof ze ervoor gemaakt zijn.
 (screen.width/2)){this.width = (this.width/2)}" onclick="javascript:if(this.width > (screen.width/2)){this.width = (this.width/2)} else {this.width = (this.width*2)}" border="0" alt='Posted image: Click to resize'>
 (screen.width/2)){this.width = (this.width/2)}" onclick="javascript:if(this.width > (screen.width/2)){this.width = (this.width/2)} else {this.width = (this.width*2)}" border="0" alt='Posted image: Click to resize'>
Wat een gepiel om die stijl van dat kleine raampje erin te krijgen ppppfffff. Zeker als je niet weet hoe ze eruit zijn gehaald. Dat heeft me een hele avond gekost met veel *&^%^(*& maar het is uiteindelijk toch gelukt.
De tip om de rubbers te gebruiken van een citroen bx was een goede want die passen echt alsof ze ervoor gemaakt zijn.
(screen.width/2)){this.width = (this.width/2)}" onclick="javascript:if(this.width > (screen.width/2)){this.width = (this.width/2)} else {this.width = (this.width*2)}" border="0" alt='Posted image: Click to resize'> (screen.width/2)){this.width = (this.width/2)}" onclick="javascript:if(this.width > (screen.width/2)){this.width = (this.width/2)} else {this.width = (this.width*2)}" border="0" alt='Posted image: Click to resize'>We zijn weer wat opgeschoten de laatste week.
Hoofdremcylinder en brake booster erop gezet en luchtfilterhuis laten stralen en spuiten. Ruitenwissermotor had het begeven dus daar is ook een andere voor gekomen. Gelijk maar voor het zicht de velgen erop gedaan die ik erbij heb gekocht. Moet zeggen dat staat een stuk beter. Het schiet allemaal lekker op maar haast heb ik niet als hij volgend voorjaar rijd en apk gekeurd is ben ik al lang blij.
 (screen.width/2)){this.width = (this.width/2)}" onclick="javascript:if(this.width > (screen.width/2)){this.width = (this.width/2)} else {this.width = (this.width*2)}" border="0" alt='Posted image: Click to resize'>
 (screen.width/2)){this.width = (this.width/2)}" onclick="javascript:if(this.width > (screen.width/2)){this.width = (this.width/2)} else {this.width = (this.width*2)}" border="0" alt='Posted image: Click to resize'>
Hoofdremcylinder en brake booster erop gezet en luchtfilterhuis laten stralen en spuiten. Ruitenwissermotor had het begeven dus daar is ook een andere voor gekomen. Gelijk maar voor het zicht de velgen erop gedaan die ik erbij heb gekocht. Moet zeggen dat staat een stuk beter. Het schiet allemaal lekker op maar haast heb ik niet als hij volgend voorjaar rijd en apk gekeurd is ben ik al lang blij.
(screen.width/2)){this.width = (this.width/2)}" onclick="javascript:if(this.width > (screen.width/2)){this.width = (this.width/2)} else {this.width = (this.width*2)}" border="0" alt='Posted image: Click to resize'> (screen.width/2)){this.width = (this.width/2)}" onclick="javascript:if(this.width > (screen.width/2)){this.width = (this.width/2)} else {this.width = (this.width*2)}" border="0" alt='Posted image: Click to resize'>-
Sander-1987
- Berichten: 180
- Lid geworden op: 06 okt 2005 21:28
- Locatie: Lommel
- Contacteer:
Dat wordt een strakke Dodge !
Ej klein vraagje, over de ruit eruit halen, hoe precies gaat dat in zijn werking ?
Want mijn linkerdeur (bestuurderdeur) de raam mechanische heeft zijn beste tijd gehad, maar nou zit ik te kl*te met de ruit.
Alvast bedankt :)
Ej klein vraagje, over de ruit eruit halen, hoe precies gaat dat in zijn werking ?
Want mijn linkerdeur (bestuurderdeur) de raam mechanische heeft zijn beste tijd gehad, maar nou zit ik te kl*te met de ruit.
Alvast bedankt :)
Dodge Viper Forum: Smart klem in luchtinlaat. Hoe krijg ik 'm weer eruit?
 (screen.width/2)){this.width = (this.width/2)}" onclick="javascript:if(this.width > (screen.width/2)){this.width = (this.width/2)} else {this.width = (this.width*2)}" border="0" alt='Posted image: Click to resize'>
Manual Door Glass and Regulator
REMOVAL & INSTALLATION
1967–76 Models
1. Remove the door trim panel and watershield.
2. Lower the glass completely.
3. On models equipped with stereo, remove the lower trim panel and speaker.
4. On models with a stationary glass panel in the door, remove the panel as follows:
A. Remove the division channel attaching screws, then remove the channel.
B. Move the glass and weatherstripping forward and out of the opening.
5. Remove the inner weatherstripping.
6. Remove the vent window lower support attaching screw.
Fig. 1: Common front door glass system
7. Locate the vent window retaining clip screw through the weatherstripping and remove the screw.
8. Lower the door glass and tilt the vent window assembly rearward.
9. Remove the vent window.
10. Raise the door glass until the regulator connectors are visible.
11. Slide the window glass forward and remove the rear regulator connector from the guide.
12. Lower the regulator and tilt the glass upward to remove the front regulator connector.
13. Tilt the glass rearward and remove it from the door.
To install:
14. Slide the glass and regulator assembly into the door and connect the regulator arms in the guides.
15. Install a new retaining clip on the vent window assembly.
16. Install the vent window assembly into the door.
17. Install the lower vent window attaching screw. Don't tighten it yet.
18. Press the vent window retaining clip into the upper door frame with the palm of your hand.
19. Tighten the lower screw.
20. Install the inner weatherstripping.
21. On models with a stationary glass panel:
A. Position the glass and weatherstripping in the window opening and insert it into the upper frame.
B. Insert the division channel run into the channel.
C. With the door glass in the down position, insert the division channel in the door and move it firmly against the stationary glass weatherstripping.
D. Install, but don't tighten, the upper and lower attaching screws.
E. Adjust the door glass in the channel.
F. Tighten the channel against the stationary glass and check for a good seal.
22. Raise the door glass to the full up position.
23. If applicable, install the stereo speaker and lower trim.
24. Install the watershield and door trim panel.
1977–88 Models
1. Remove the door trim panel and watershield.
2. Lower the glass fully.
3. On models equipped with stereo, remove the lower trim panel and speaker.
4. On models with a stationary glass panel in the door, remove the panel as follows:
A. Remove the division channel attaching screws and remove the channel.
B. Move the glass and weatherstripping forward and out of the opening.
5. Remove the inner weatherstripping.
6. Pull back the upper glass run 8–10 in. (20–25cm), then remove the upper and lower vent window attaching screws.
Fig. 2: Rear door glass system
7. Remove the vent window.
8. Slide the window glass forward off the regulator arms and remove the glass from the door.
9. Drill out the regulator mounting rivets and remove the regulator assembly from the door.
To install:
10. Position the regulator in the door.
11. Using 1⁄4 –20 screws and nuts in place of the rivets, torque the regulator mounting screws to 90 inch lbs. (10 Nm).
12. Slide the glass onto the regulator arms and into the rear glass run.
13. Install the plastic nut and U-nut on the vent window assembly.
14. Install the vent window assembly into the door.
15. Install the upper and lower vent window attaching screws. Don't tighten them yet.
16. Move the glass run back to the vent window by placing the run adjacent to the door channel and pressing it into the channel using a wide-bladed chisel or similar tool. Press in both corners to ensure the hidden lip engages the channel.
17. Install the inner weatherstripping.
18. Raise or lower the vent window to maintain a 0.062 in. (1.6mm) fore-aft glass free-play. Then, with the glass up, tighten the upper screws.
19. Hold the vent against the glass, with the glass down, and tighten the lower screws.
20. On models with a stationary glass panel:
A. Position the glass and weatherstripping in the window opening and insert it into the upper frame.
B. Insert the division channel run into the channel.
C. With the door glass in the down position, insert the division channel in the door and move it firmly against the stationary glass weatherstripping.
D. Install, but don't tighten, the upper and lower attaching screws.
E. Adjust the door glass in the channel.
F. Tighten the channel against the stationary glass and check for a good seal.
21. Raise the door glass to the full up position.
22. If applicable, install the stereo speaker and lower trim.
23. Install the watershield and door trim panel.
heel verhaal, ik hoop dat je er wat aan hebt
Edited By frenkie on 1196374378
Dodge W200 1976
Chrysler 300 1969
Chrysler 300 1968 (sold)
Chrysler 300 1969
Chrysler 300 1968 (sold)
-
Sander-1987
- Berichten: 180
- Lid geworden op: 06 okt 2005 21:28
- Locatie: Lommel
- Contacteer:
Vandaag(10-12-2007) de verlichting aangesloten met relais. Niet dat ik niet genoeg lichtopbrengst had maar de tip om zo je schakelaar een langer leven te geven vond ik wel de moeite waard.
Gelijk rekening gehouden met eventuele verstralers of mistlampen door een extra relais erin te zetten.
Ik heb gelijk alle bedrading maar in een doos weggewerkt zodat vocht hier geen kans heeft.
Weer een stap verder, maar we zijn er nog niet er is nog genoeg te doen eer ik de weg op kan.
 (screen.width/2)){this.width = (this.width/2)}" onclick="javascript:if(this.width > (screen.width/2)){this.width = (this.width/2)} else {this.width = (this.width*2)}" border="0" alt='Posted image: Click to resize'>
 (screen.width/2)){this.width = (this.width/2)}" onclick="javascript:if(this.width > (screen.width/2)){this.width = (this.width/2)} else {this.width = (this.width*2)}" border="0" alt='Posted image: Click to resize'>
 (screen.width/2)){this.width = (this.width/2)}" onclick="javascript:if(this.width > (screen.width/2)){this.width = (this.width/2)} else {this.width = (this.width*2)}" border="0" alt='Posted image: Click to resize'>
Edited By Brutus on 1197286558
Gelijk rekening gehouden met eventuele verstralers of mistlampen door een extra relais erin te zetten.
Ik heb gelijk alle bedrading maar in een doos weggewerkt zodat vocht hier geen kans heeft.
Weer een stap verder, maar we zijn er nog niet er is nog genoeg te doen eer ik de weg op kan.
(screen.width/2)){this.width = (this.width/2)}" onclick="javascript:if(this.width > (screen.width/2)){this.width = (this.width/2)} else {this.width = (this.width*2)}" border="0" alt='Posted image: Click to resize'> (screen.width/2)){this.width = (this.width/2)}" onclick="javascript:if(this.width > (screen.width/2)){this.width = (this.width/2)} else {this.width = (this.width*2)}" border="0" alt='Posted image: Click to resize'> (screen.width/2)){this.width = (this.width/2)}" onclick="javascript:if(this.width > (screen.width/2)){this.width = (this.width/2)} else {this.width = (this.width*2)}" border="0" alt='Posted image: Click to resize'>Edited By Brutus on 1197286558